
Chimney Repair · Chicagoland, IL
Why the Top of Your Chimney Always Fails First — and How Far Down the Damage Really Goes
Chimney deterioration is never evenly distributed. It is worst at the top course and improves steadily on the way down, and that gradient is the most useful diagnostic tool a homeowner has. It tells you why the damage happened, whether you need a repoint or a rebuild, and — the question that decides the price — how far down the mason has to go.
2026-08-22
Quick Answer
The top of a chimney fails first because it is the only masonry on a house exposed to weather on all four sides plus the top, with no heated interior behind it to dry it out and no roof above it to shed water. Damage grades downward from the crown, which is why chimney repairs are scoped as 'rebuild down to sound masonry' rather than by a fixed number of courses. Emerald Masonry LLC repairs and rebuilds chimneys across Chicagoland — family-owned, career masons, licensed and insured. Call (708) 288-1696.
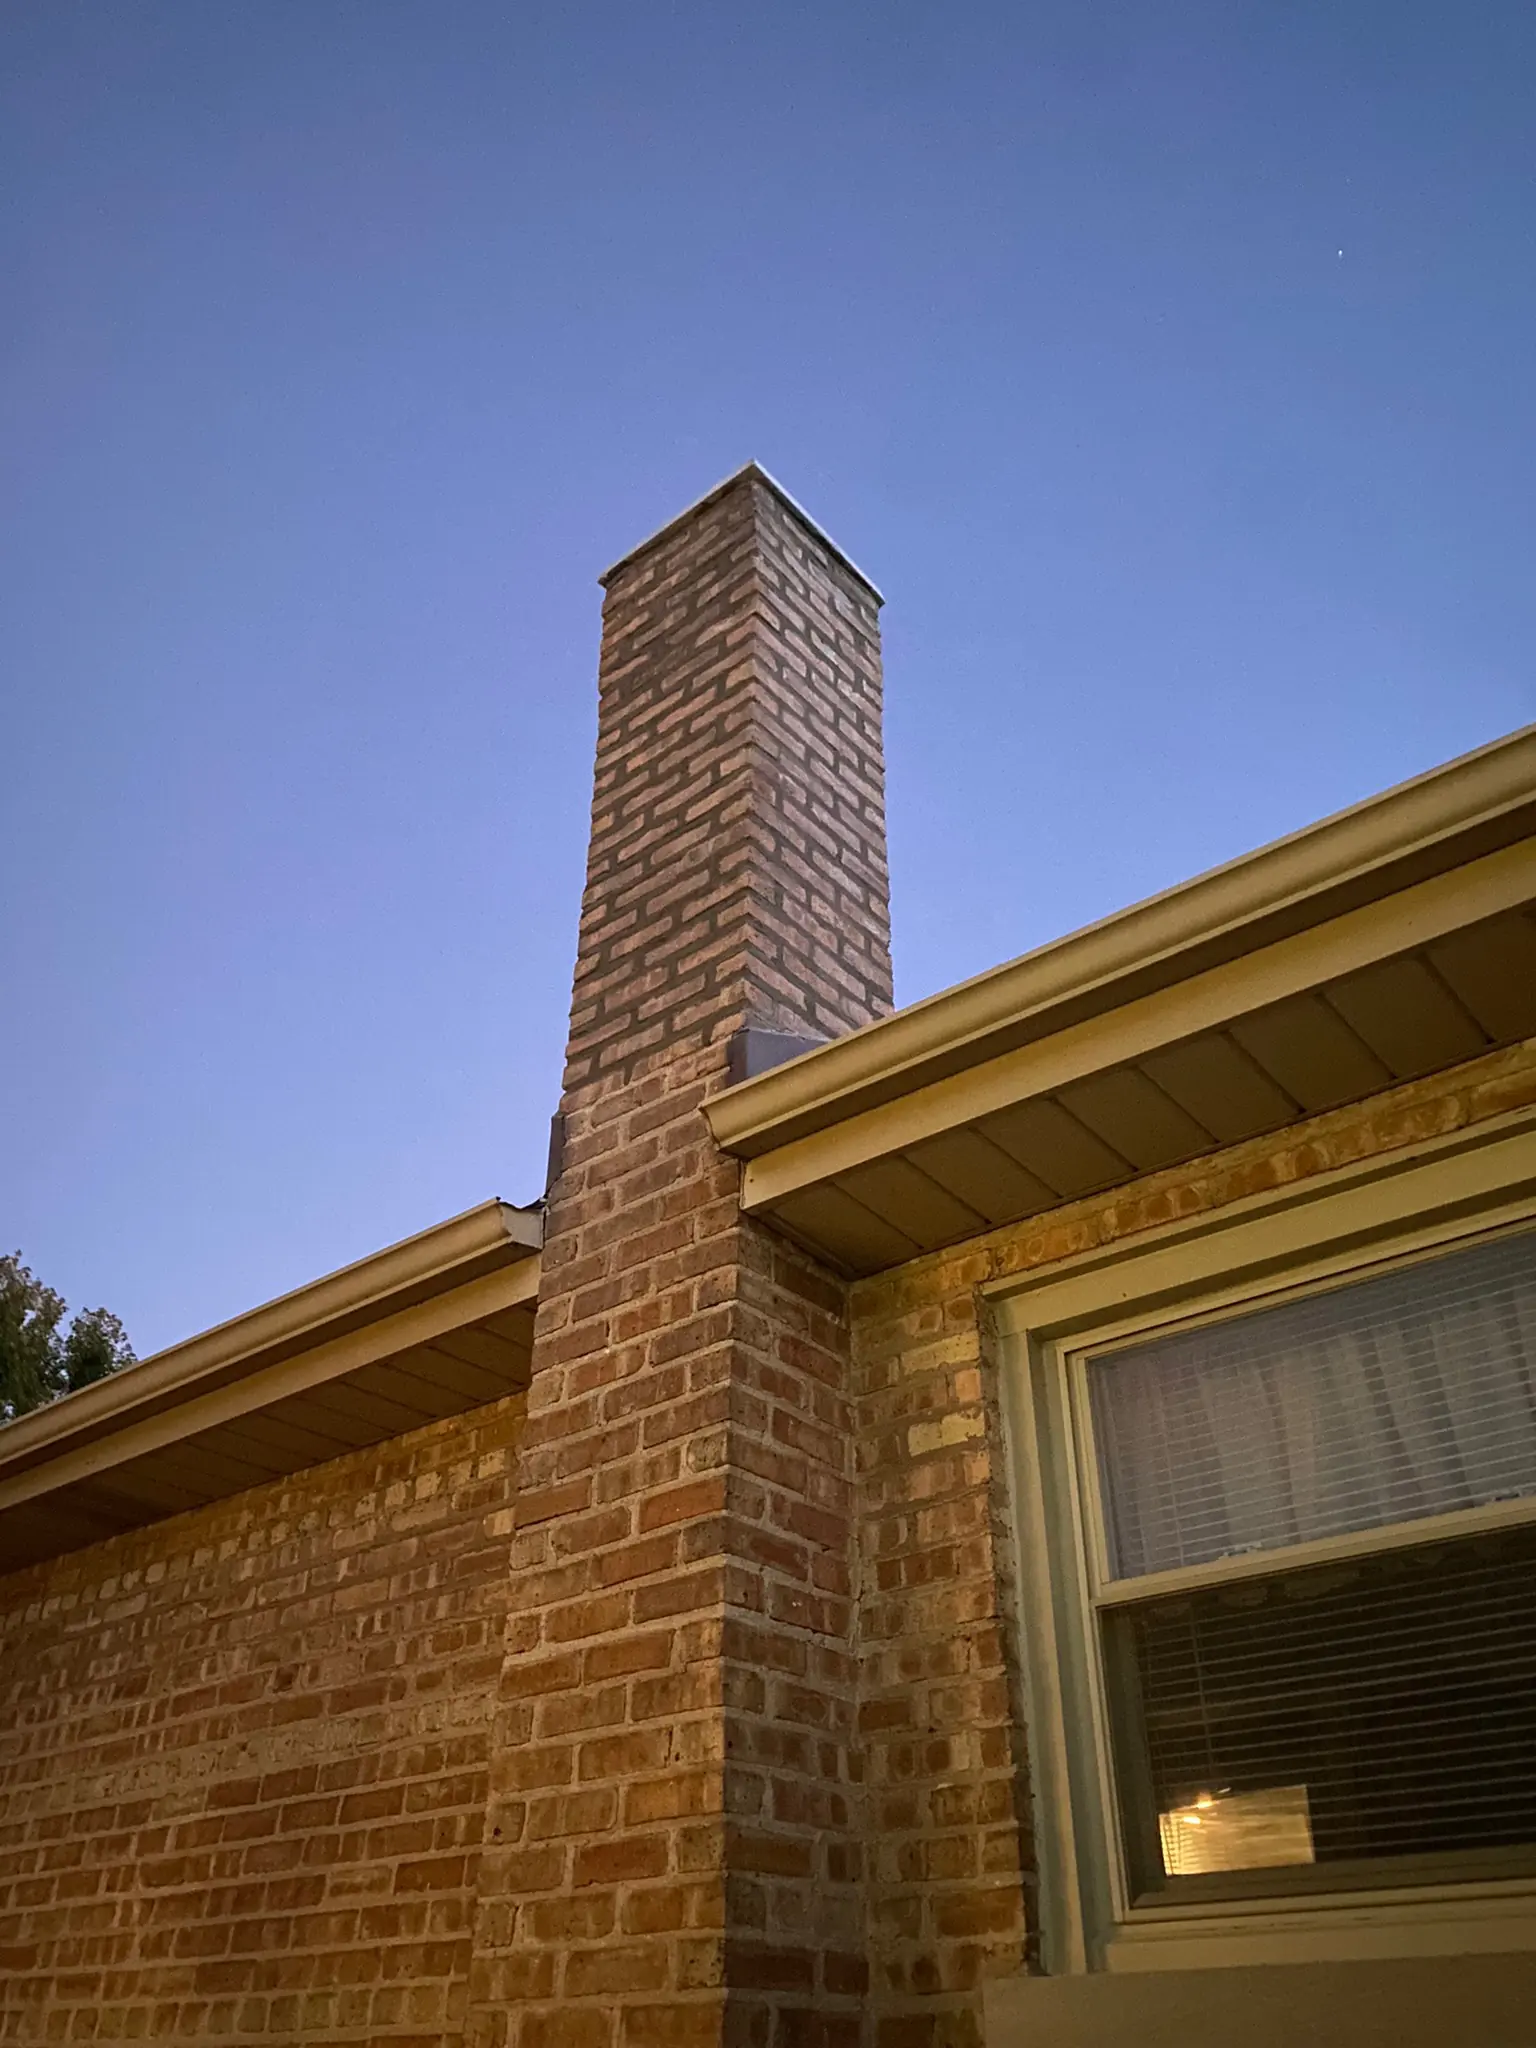
The Damage Is Never Evenly Distributed
Look closely at almost any deteriorating masonry chimney in Chicagoland and you will see the same picture. The top course is the worst. The course below it is slightly better. Three courses down is noticeably better. At the roofline the mortar is mostly intact, and below the roofline the masonry often looks nearly new.
That gradient is not a coincidence, and it is not random. It is the most useful piece of diagnostic information a homeowner or a mason has, because it explains the cause, predicts the scope, and answers the question that actually decides the price of the job: how far down does this have to come?
Emerald Masonry LLC repairs and rebuilds chimneys throughout Chicago and the Chicagoland suburbs. Family-owned, licensed, bonded and insured, career masons with decades of experience, free on-site estimates. Call (708) 288-1696.
What Makes the Top of a Chimney Different
Every other piece of masonry on your house has at least one advantage that the chimney top does not.
A wall has a roof over it. The chimney has nothing over it but the crown.
A wall has one weather face. The chimney above the roofline has four, plus the top. Wind-driven rain hits it from whatever direction the storm comes from, and there is no dry side.
A wall has a heated house behind it. Interior warmth pushes moisture outward through a wall and helps it dry. Above the roofline, the chimney has flue on the inside and cold air on the outside. On a chimney serving nothing, or serving a modern high-efficiency appliance that vents elsewhere, there is no heat in it at all.
A wall is partly sheltered. The chimney top is the most wind-exposed masonry on the building, which means it takes more driven rain and loses heat faster.
Put those together and you get a piece of masonry that gets wetter than anything else on the house and dries slower than anything else on the house. In Chicagoland, where a winter can put masonry through dozens of freeze-thaw cycles, that combination is decisive.
The freeze-thaw mechanism, briefly
Brick and mortar are porous. Water moves into the pore structure by capillary action. When that water freezes it expands by roughly nine percent, and it has nowhere to expand to except against the surrounding material. Each cycle does a very small amount of damage. Repeat it forty times a winter, for forty winters, on a saturated material, and the mortar turns to sand and the brick faces pop off in flakes.
The reason the top fails first is simply that the top is wettest and coldest for the longest. The gradient you can see on the chimney is a visual record of how much water each course has been holding.
The Second Mechanism: Water From the Inside
The exposure gradient explains most of it. There is a second driver that catches people by surprise, especially in older Chicago-area housing.
When a masonry chimney was built for a coal or an early gas furnace, it was sized for a hot, dry, fast-moving exhaust that kept the flue warm and dry. Replace that furnace with a modern high-efficiency unit that vents out a sidewall, and you frequently leave the water heater alone in a flue built for something much larger. The exhaust is cooler, wetter, and far too small a volume to warm the flue.
The result is condensation inside the chimney. Moisture — often acidic — condenses on the flue walls, soaks into the masonry, and works outward. Now the chimney is being wetted from both faces at once, and the top, where the flue is coldest, gets the worst of it. This is why an abandoned or under-used chimney often deteriorates faster than one still being worked hard.
What the Gradient Tells You
Once you understand the mechanism, you can read a chimney from the ground.
- Damage confined to the top one to three courses and the crown. Classic exposure failure, caught reasonably early. Usually a crown rebuild plus rebuilding a few courses.
- Damage grading down five, eight, ten courses. Longer-standing saturation, or a crown that failed years ago and has been running water down the wall since.
- Damage all the way to the roofline, plus staining below it. The flashing is likely involved as well, and the whole above-roof section is generally rebuilt.
- Damage worse on one face than the others. Prevailing weather exposure — in Chicagoland typically north and west — or a specific water path such as a roof valley discharging against the chimney.
- Damage on the interior faces of the flue and staining on the top floor. Suspect condensation and an oversized or unlined flue.
- A visible lean, or a horizontal crack at the roofline. Different problem entirely — that is a structural or settlement issue and it needs to be evaluated before anyone quotes brick.
Signs of Chimney Damage You Can See From the Ground
Grab binoculars and look for:
- A cracked, spalled, or missing crown, or a crown that is just a thin skim of mortar sloped off the flue tile
- Mortar joints receding, dark, or visibly open at the top courses
- Spalling brick — faces flaked or sheeted off, leaving a rougher, lighter interior exposed
- Missing brick or gaps in the top course
- A chimney cap that is missing, rusted, or dislodged
- Clay flue tile that is cracked, chipped, or sitting proud of a broken crown
- Dark saturation staining running down the chimney faces
- White efflorescence, the powdery deposit left behind when water passes through masonry and evaporates
- Rust staining at any embedded steel or a chase cover
- A visible lean, or a gap opening between the chimney and the house
- Debris in the firebox — sand, mortar crumbs, or pieces of tile
Inside, check the top-floor ceiling and walls around the chimney for staining, and the attic where the chimney passes through, which is often where a leak is visible long before it reaches finished ceilings.
Risks of Waiting
Chimney damage escalates faster than most masonry, because the mechanism driving it accelerates.
Once the crown cracks, water enters the top of the chimney directly rather than running off it. That saturates the masonry, so the freeze-thaw damage speeds up. As the joints open, more water enters, which opens the joints further. Meanwhile the water is running down inside the chimney and reaching the flashing, the framing, and the interior finishes.
Structurally, the top of a chimney that has lost its mortar is a stack of loose brick standing several feet above your roof in the wind. Functionally, a chimney with a cracked flue or spalled interior is no longer safely containing combustion gases from whatever appliance still vents into it — which is a carbon monoxide question, not just a masonry one, and it should be checked by a qualified inspector.
Financially, the curve is steep. A crown repair and repoint caught early is a modest job. The same chimney three or four winters later is an above-roofline rebuild with staging.
The Repair Ladder — From Least to Most
Chimney repairs sit on a ladder, and a good estimate tells you which rung you are on and why.
- Cap. A missing or failed cap lets rain straight down the flue. Cheapest fix on the list and the one most often skipped.
- Crown repair or rebuild. The crown should be a proper sloped slab that overhangs the masonry with a drip edge, not a mortar wash troweled flush to the brick. A thin mortar wash is the number one reason chimneys start failing from the top.
- Flashing and counterflashing. Where the chimney meets the roof. Frequently the actual source of an interior leak, and frequently blamed when the real path is through the crown.
- Repointing. Grind out failed joints and repack with matched mortar — appropriate only while the brick itself is sound.
- Partial rebuild. Take down the deteriorated top courses to sound masonry and rebuild them.
- Full above-roofline rebuild. Everything above the roof comes down and goes back up.
- Full rebuild, or relining, or removal. When the chimney is structurally compromised below the roofline, when the flue itself has failed, or when an abandoned chimney is no longer worth keeping.
The scope is written as "down to sound masonry," not as a course count. Anyone quoting an exact number of courses from the ground is guessing, because you cannot tell where sound masonry begins until you are up there sounding it.
How the Work Is Actually Done
- Inspect from the roof, not from the driveway, and check the flue and the interior.
- Sound the masonry — tapping reveals courses that have lost bond behind faces that still look intact.
- Establish the rebuild depth and confirm it with the owner before demolition.
- Set up access and protection — staging or roof jacks, roof membrane protection, and ground protection.
- Take down the deteriorated section carefully, salvaging brick worth reusing.
- Inspect and address the flue — tile condition, liner, and whether relining is warranted.
- Rebuild in matched brick and mortar, holding the original coursing, bond and any corbelled detailing at the top.
- Form a proper crown — sloped, reinforced where appropriate, with a bond break at the flue tile and an overhang with a drip edge past the face of the brick.
- Repoint the sound masonry below the rebuild so the whole stack is weather-tight.
- Address flashing and counterflashing and coordinate with roofing where needed.
- Install a cap sized to the flue.
- Clean down and review the finished work.
Materials and Matching
Mortar must be softer than the brick it sits against. Mortar is the sacrificial component of a wall, and that principle matters more on a chimney than anywhere else, because a chimney is the most weather-loaded masonry you own.
- Type N — the general-purpose mix for most twentieth-century chimney brick.
- Type S — higher strength, used where conditions warrant, and too hard for soft older brick.
- Lime-rich and Type O mixes — for soft pre-1900 brick on greystones, Victorians and older two-flats, where a Portland-heavy mortar would spall the faces.
Brick matching on a chimney rebuild is easier than on a wall in one respect: much of the original brick can often be salvaged and reused, particularly the sound material from lower courses. Where new brick is required, matching size, colour range and texture matters, and it should be checked against the actual chimney in daylight.
The crown deserves its own line. A properly formed concrete crown with an overhang and drip edge will outlast a troweled mortar wash by decades. It is a small part of the cost and most of the longevity.
What Drives the Cost
- How far down sound masonry is found — the single biggest variable
- Roof pitch, height and access, and whether staging or a lift is needed
- Chimney size — a large multi-flue stack is a different job than a single-flue chimney
- Crown and cap scope
- Flue condition and whether relining is required
- Brick matching difficulty, especially on historic or unusual material
- Flashing coordination with roofing
- Season and weather, since masonry has temperature limits for curing
Nobody can price this honestly over the phone, and reputable masons will not try. What you should expect is a free on-site look, a written scope that names the expected rebuild depth, and a clear statement of what happens if the damage runs deeper than it appears.
Prevention and Maintenance
- Look at your chimney every spring with binoculars, after the freeze-thaw season has done its work.
- Keep a cap on the flue. It is the cheapest protection available.
- Treat the crown as a maintenance item. Hairline cracks in a crown can be addressed long before they become a rebuild.
- Check the flashing whenever the roof is worked on, and make sure the roofer and the mason are talking to each other.
- Do not seal a chimney with a film-forming coating. Masonry has to breathe; trapping moisture inside a chimney is how you accelerate the exact damage you are trying to prevent.
- Have the flue inspected if you have changed heating appliances, because an oversized or orphaned flue is a real deterioration driver.
Local Context — Why Chicagoland Chimneys Take It Harder
Chicagoland masonry lives in a genuinely punishing environment: a long freeze-thaw season, lake-influenced moisture, wind exposure across flat terrain, and a housing stock full of tall, slender, hard-working chimneys. Chicago brick bungalows, greystones, two-flats, post-war ranches and Georgians all carry masonry chimneys that were built for heating equipment nobody uses any more.
Add the region's very large stock of pre-1930 solid masonry — soft brick, lime mortar, tall corbelled tops — and you have chimneys that are both more exposed and less forgiving of the wrong repair than almost anything else on the building.
Related Services
- Chimney repair and rebuilding
- Tuckpointing and repointing
- Brick repair and brick replacement
- Historic masonry restoration
- Residential masonry restoration
The Bottom Line
Your chimney is failing from the top because the top is the wettest, coldest, most exposed masonry on your house, with no roof over it and no warm building behind it. The gradient of that damage — worst at the crown, improving as it descends — tells you what caused it and how deep the repair has to go.
Read it early, while the answer is still "the crown and three courses." Read it late and the answer is "everything above the roof."
Emerald Masonry LLC is a family-owned, licensed and insured masonry contractor serving Chicago and the Chicagoland suburbs led by career masons with decades of hands-on experience in tuckpointing, chimney repair, brick repair and replacement, lintel and parapet repair, foundation and limestone/sill repair, caulking, sealing, and commercial, residential, and historic masonry restoration. Free on-site estimates — call (708) 288-1696 or request an estimate online.
Frequently Asked Questions
Why is the top of my chimney crumbling but the bottom looks fine?
Because exposure is not uniform. Above the roofline the chimney is wet on four sides and the top, has no heated interior behind it to drive moisture out, and freezes harder and longer than any other masonry on the house. Below the roofline it is sheltered, partly enclosed, and often warmed from inside, so it dries between rains.
How far down does a chimney need to be rebuilt?
Down to sound masonry, which is found by sounding and probing the wall rather than by picking a number in advance. Sometimes that is three or four courses; sometimes it is everything above the roofline. An honest estimate states the expected depth and how it will be handled if the damage runs further.
Is a chimney crown the same thing as a chimney cap?
No. The crown is the sloped concrete or mortar slab across the top of the masonry that sheds water off the chimney. The cap is the metal cover sitting over the flue opening that keeps rain, animals and debris out of the flue. A chimney needs both, and they fail differently.
Can a crumbling chimney top just be repointed instead of rebuilt?
Only if the brick itself is still sound and just the joints have eroded. Once the brick faces have spalled, units have lost bond, or the top courses can be moved by hand, repointing has nothing solid to pack against and will fail within a few years.
How can I tell if my chimney needs work without getting on the roof?
Use binoculars from the ground. Look for missing or receding mortar, brick faces that have flaked off, a cracked or missing crown, a visible lean, dark saturation staining, and daylight or gaps in the top courses. Also check the ceiling and walls of the top floor near the chimney for staining.
Why does my chimney leak even though the roof is new?
Because most chimney leaks are not roof leaks. Water enters through a cracked crown, open mortar joints, or saturated brick and runs down inside the chimney, appearing at the ceiling well away from where it got in. Flashing is the third path and the one most often blamed.
Does an unused chimney still need repair?
Yes, and unused chimneys often deteriorate faster. Without regular hot fires drying the masonry, and frequently with a furnace or water heater venting cooler, wetter exhaust into an oversized flue, moisture stays in the structure. An abandoned chimney is still masonry standing above your roof.
How much does chimney repair cost in Illinois?
It is driven by how far down the sound masonry is, roof pitch and access, staging, whether the crown and flue need work, and how difficult the brick is to match. A crown repair with a repoint and a full above-roofline rebuild are very different jobs. Get a free on-site written estimate rather than a phone quote.
Should I rebuild the chimney or remove it?
If the flue is still serving a furnace, water heater or fireplace, it has to be repaired. If it is fully abandoned, removal down below the roofline and patching the roof is sometimes the more economical answer — but it is a structural and roofing decision as much as a masonry one, and it should be priced both ways.
How long does a properly rebuilt chimney last?
A chimney rebuilt to sound masonry with matched mortar, a properly formed crown with an overhang and drip edge, and a good cap should perform for decades. The crown and the cap are the parts that determine how long — most chimneys that fail early fail from the top down because the crown was an afterthought.